Ultrasonic Sensor
Initial investigation into ultrasonic sensors and MATLAB resulted in a sleek distance and car speed detector.
June 10, 2025 - Written by Luke Beasley.
Ever wondered if a cheap sensor, some tape, and some wiring could clock your car speed? Taking uni coursework too far made me find out.
Project Outline
We had three main objectives in the coursework:
- To set up an ultrasonic sensor circuit, and program it to find distances.
- To investigate the effects of reflective or irregular surfaces on the performance of the sensor, and mitigate these effects.
- To find a real-world use for the sensor.
Initial Build and Objectives
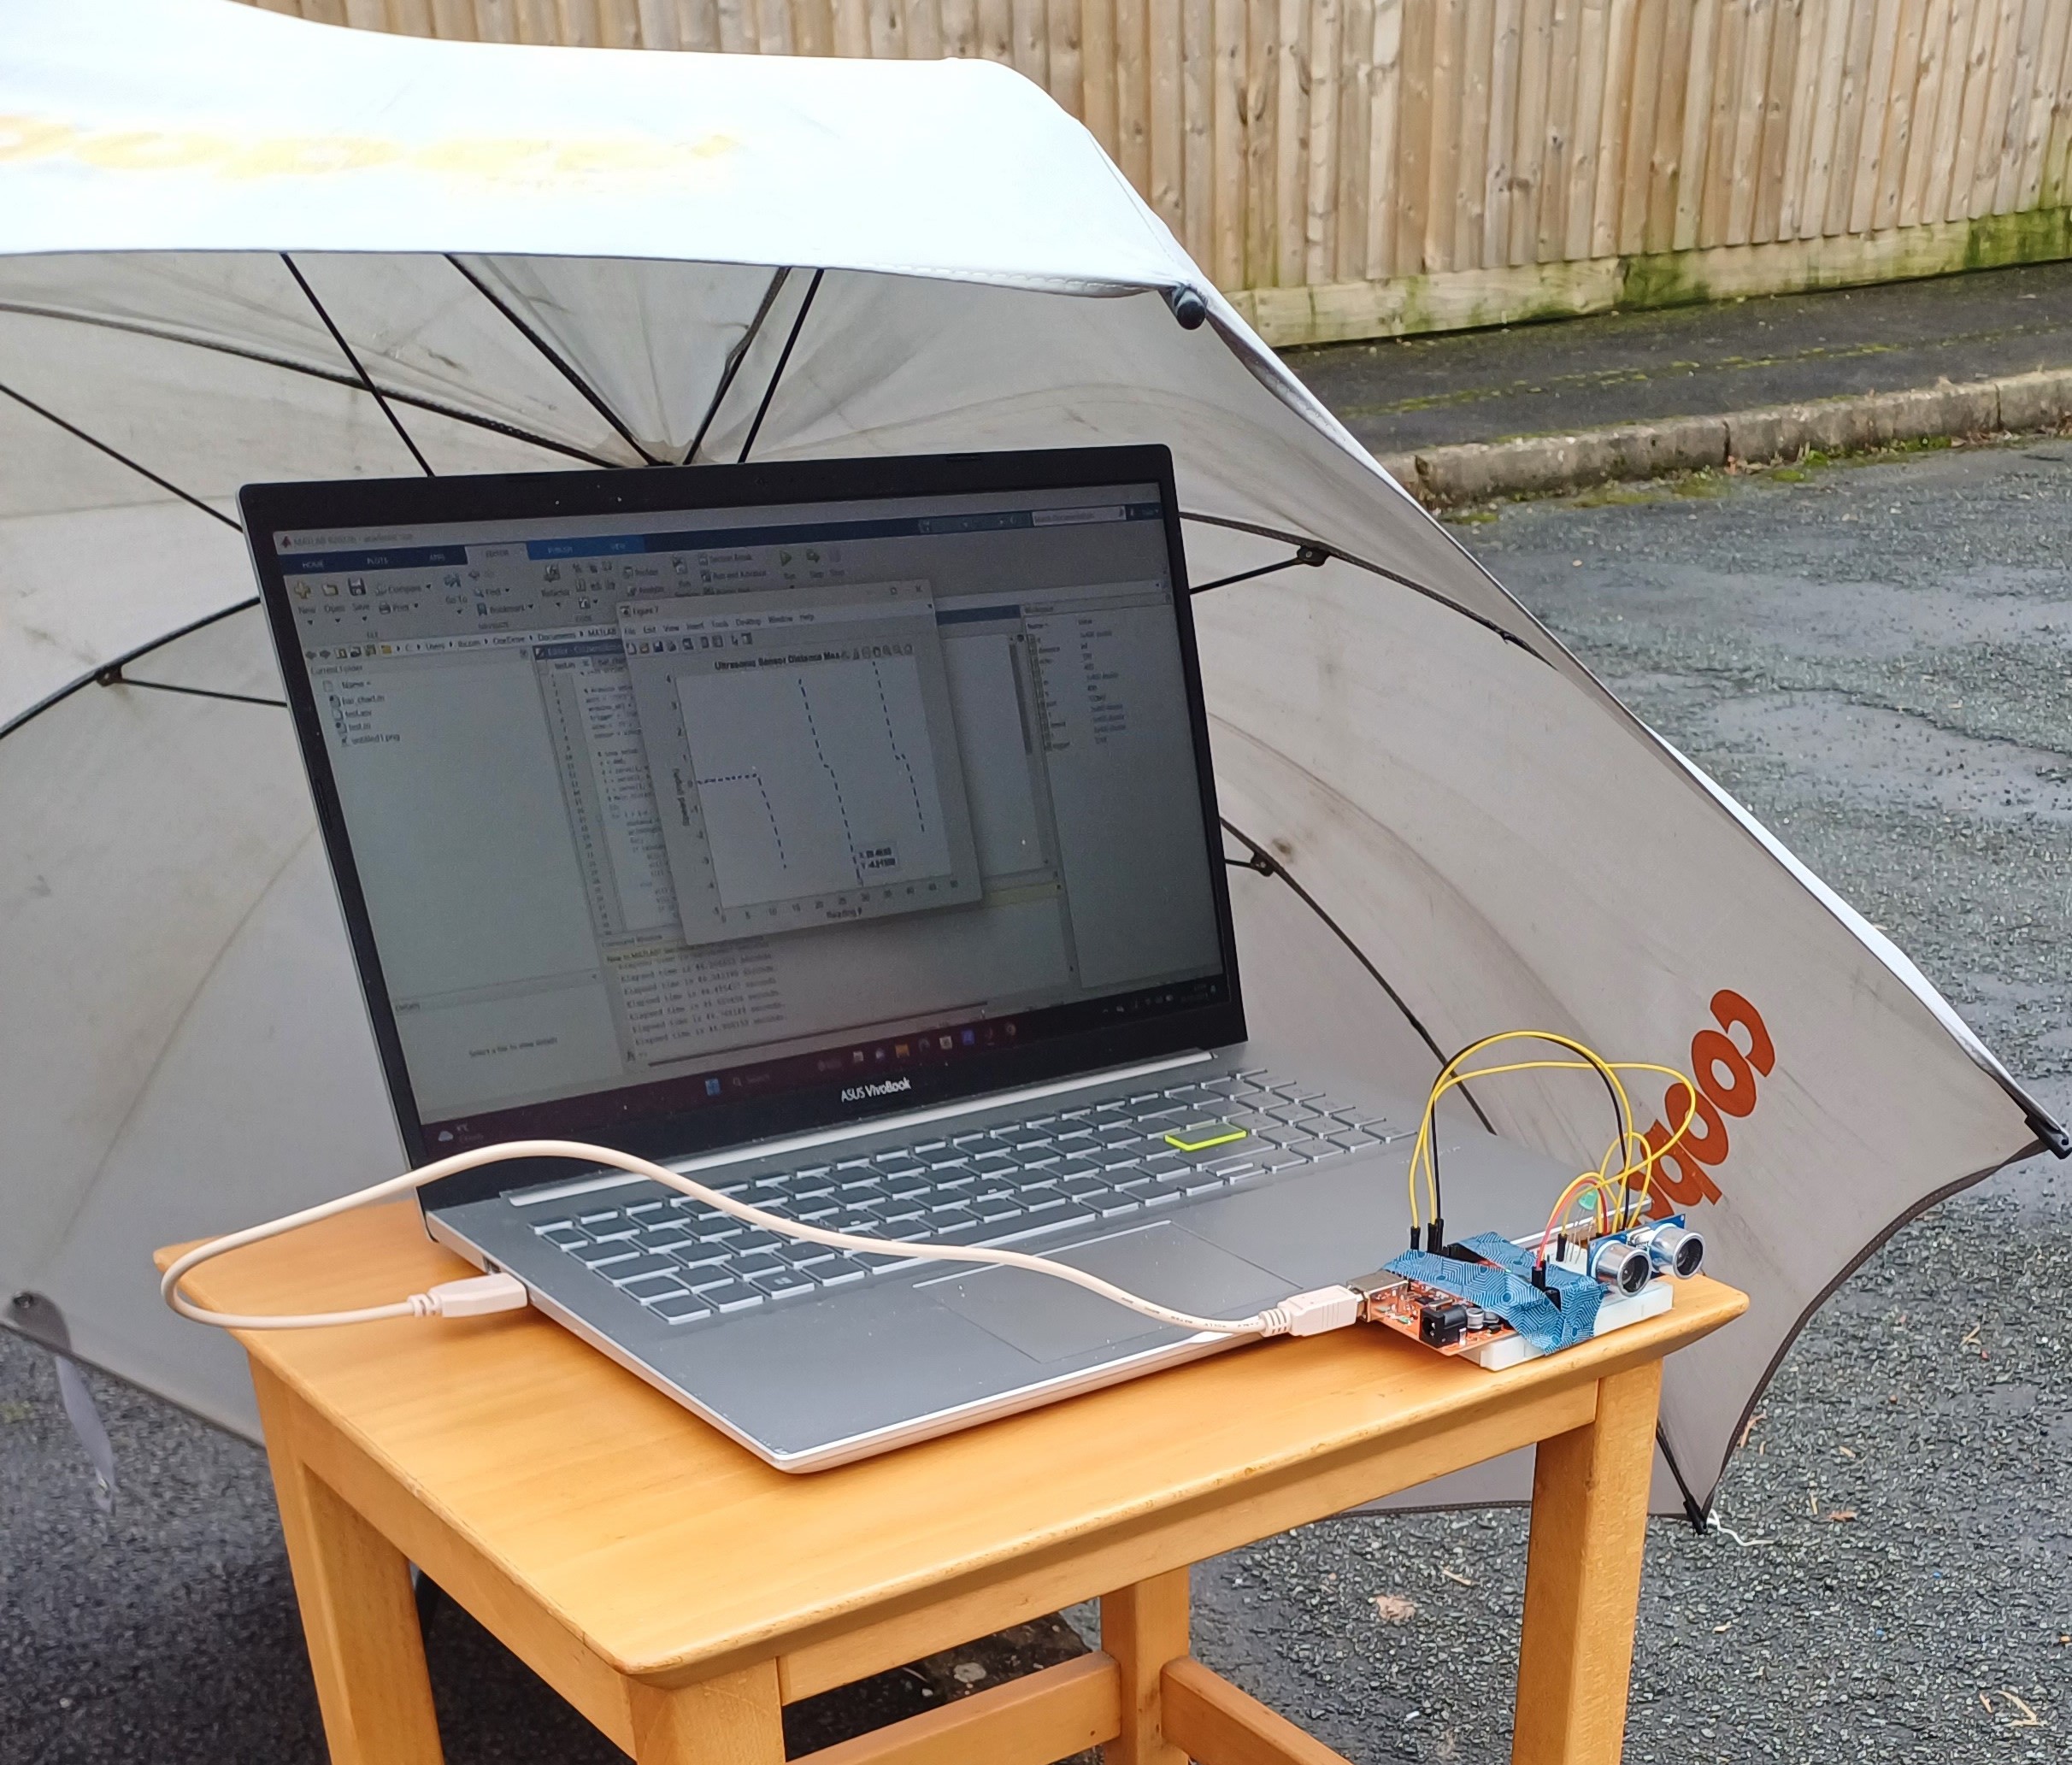
The build process for this project was quite fun, straightforward, and didn’t take long to complete. The basic build (with the ultrasonic sensor powered up and connected to the Arduino) was improved by a blinking LED which gave visual feedback when the device was operating. The experimental setup is shown below.
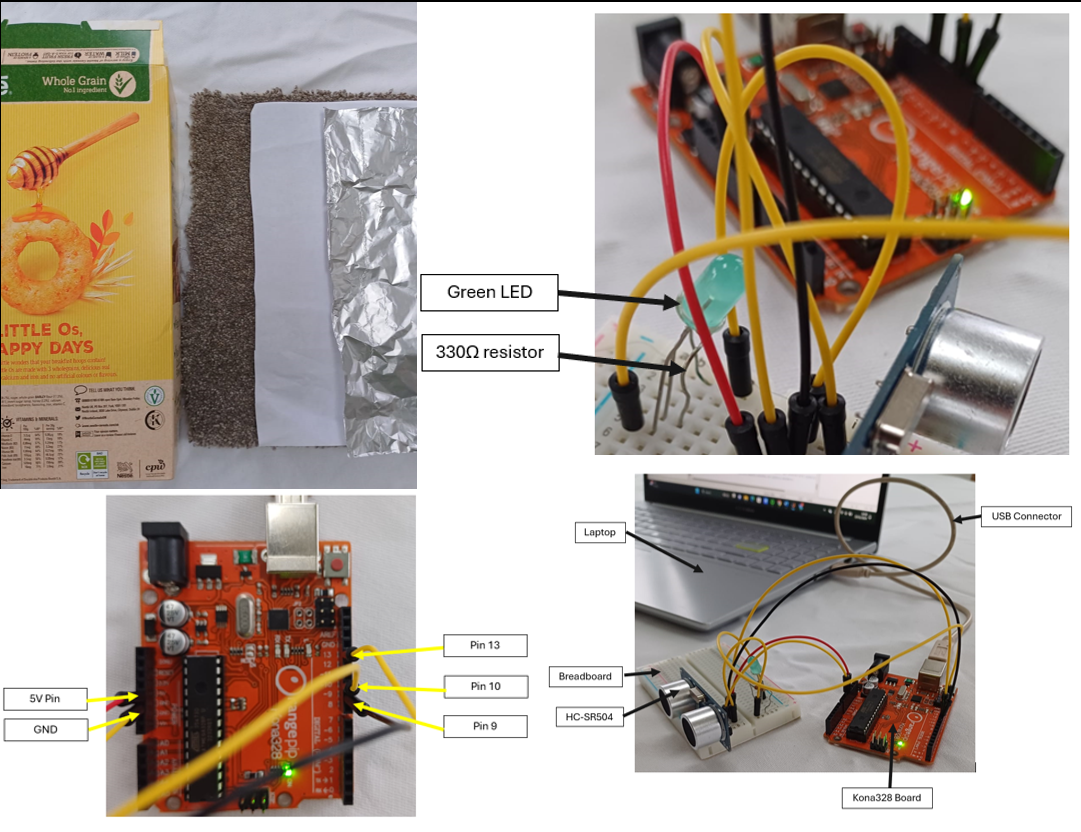
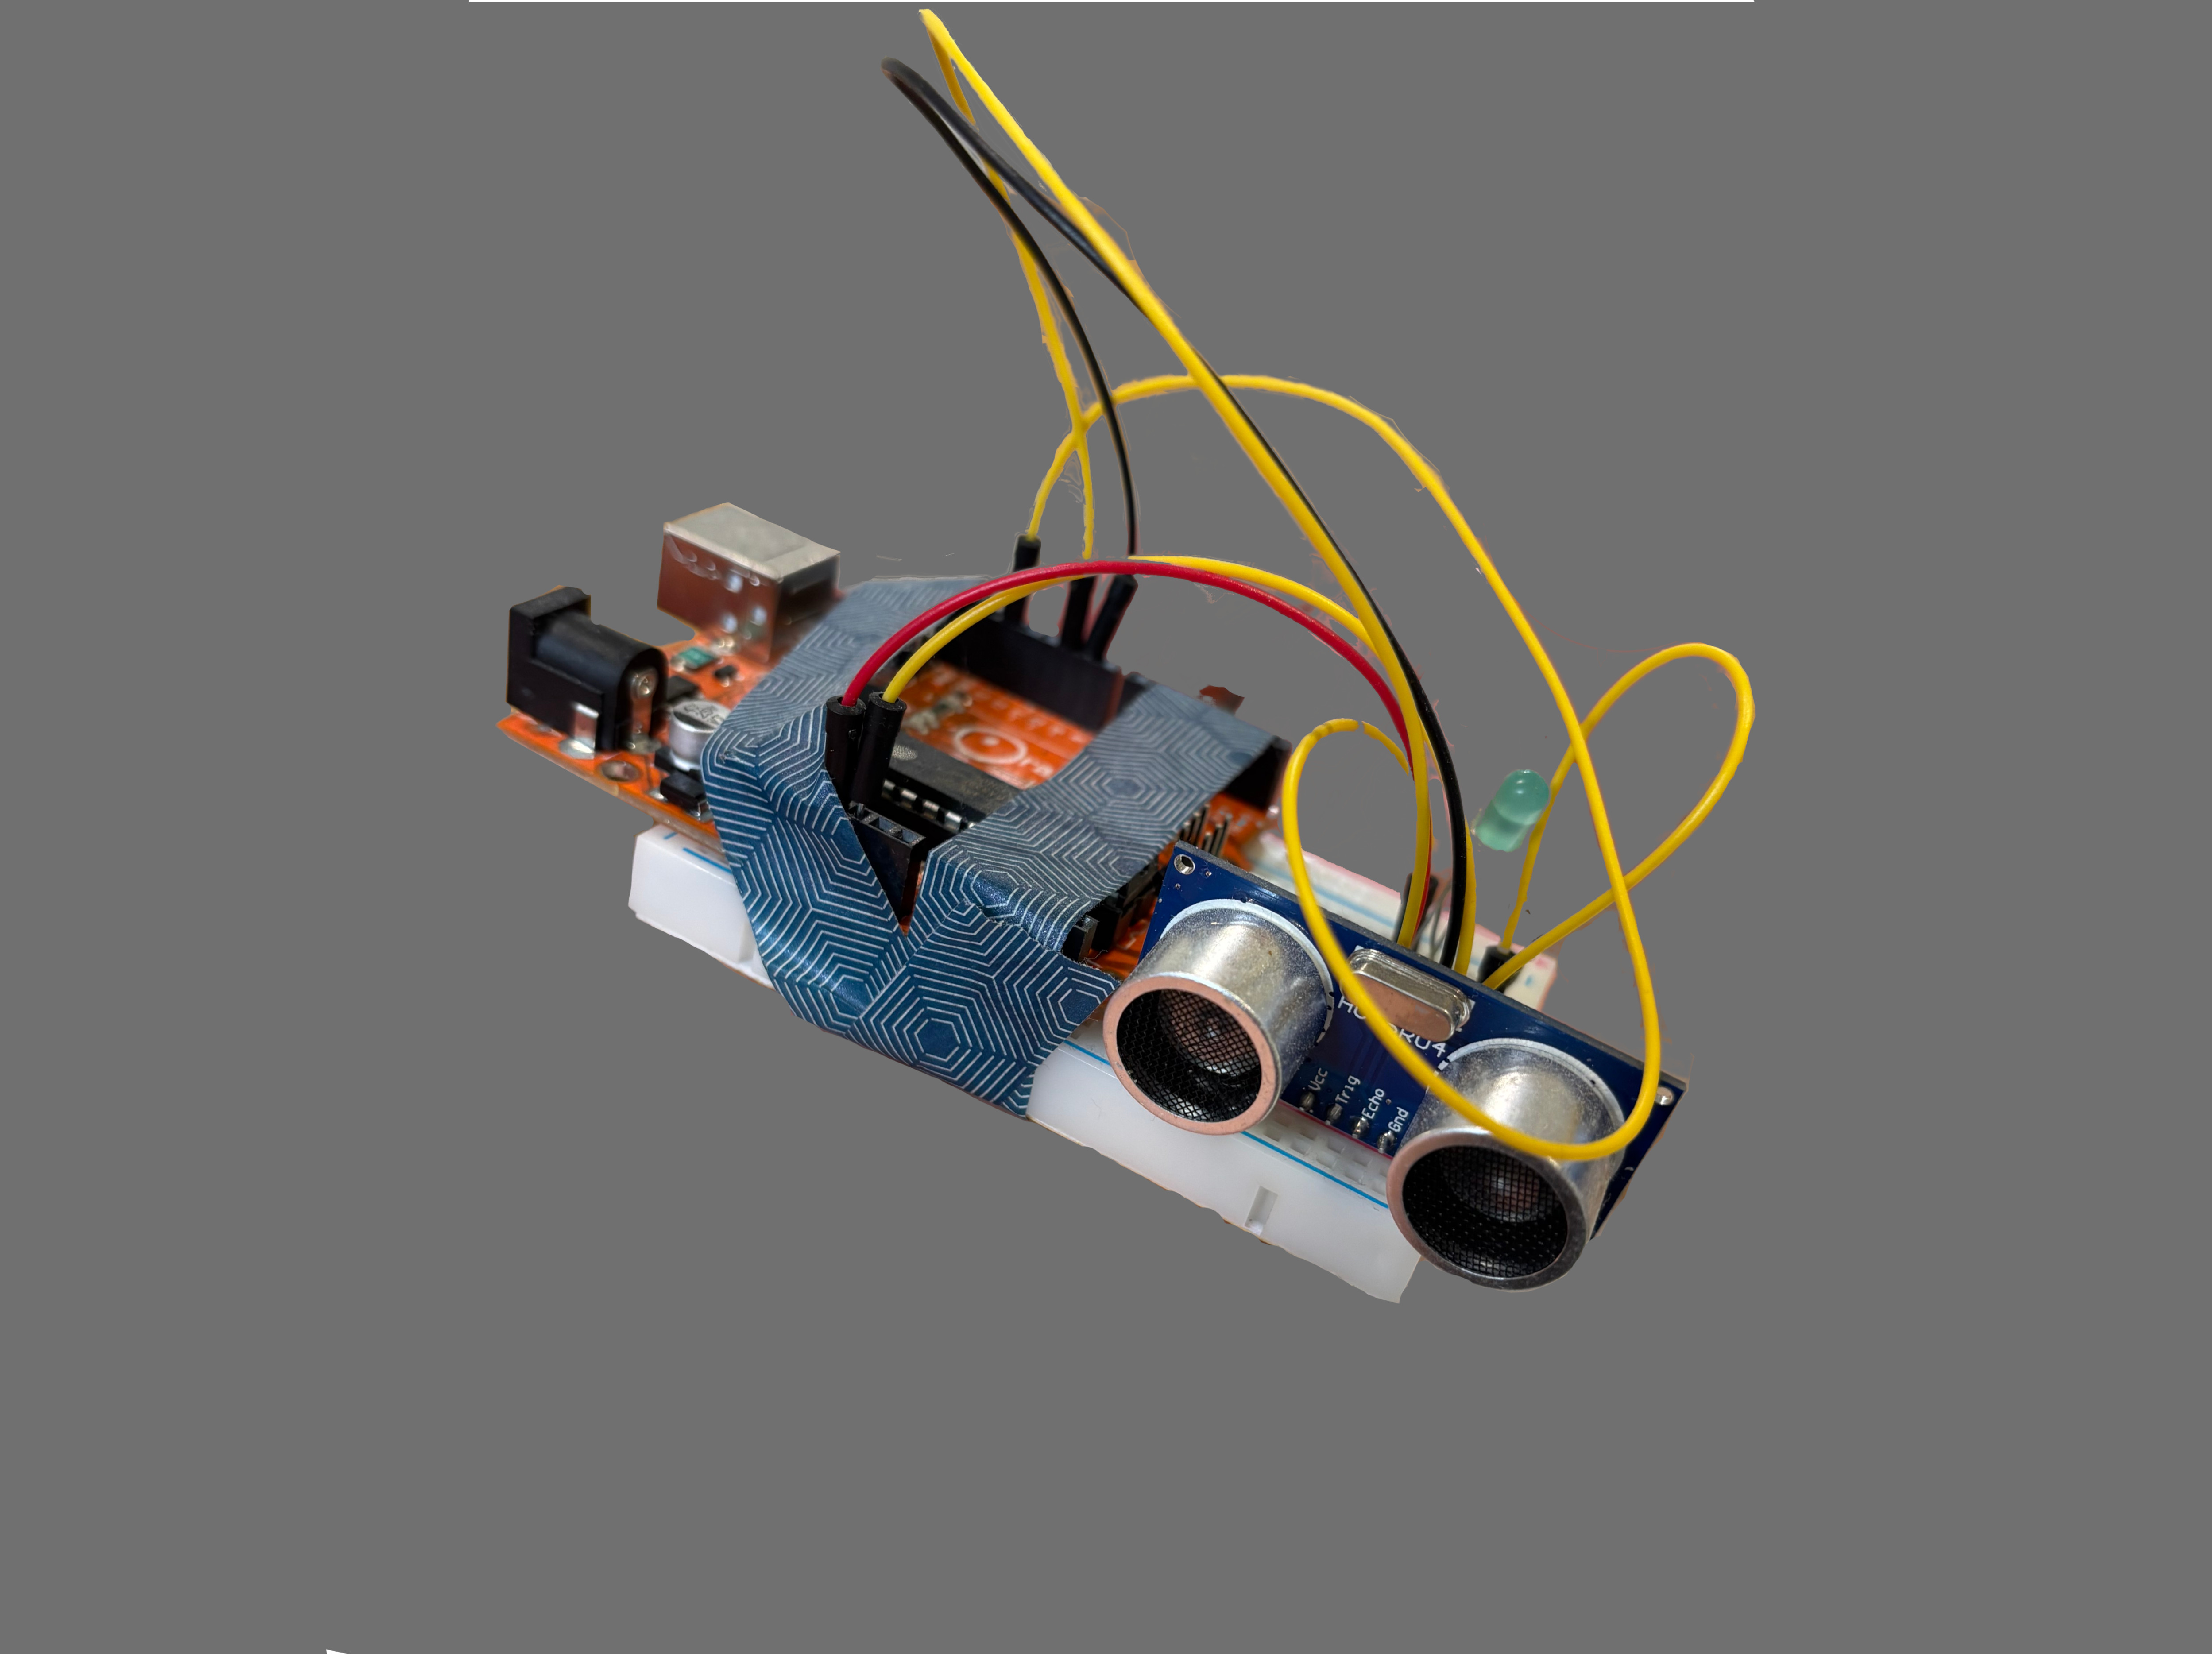
I improved this further by taping the Arduino to the breadboard for convenience (and because it just looked better) - see title image.
Data Processing
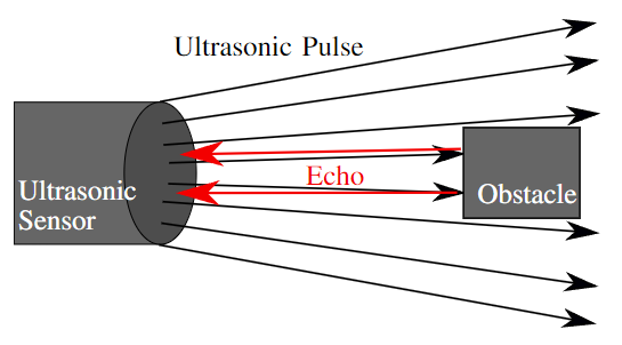
An ultrasonic sensor transmits and receives ultra-high frequency sound - because we know the speed of sound, we can then determine the distance between the sensor and an object - this diagram helps explain the concept [1].
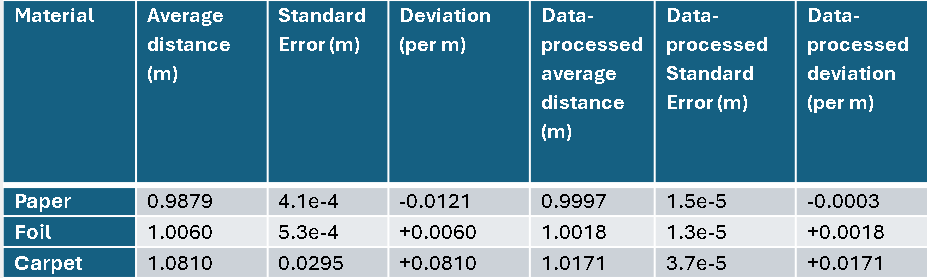
Once set up, I decided to see how the sensor responded to measuring the distance of different materials. Turns out, its performance varied significantly with material type and distance. Paper, foil, and even carpet were tested - as you might expect, the less uniform and more sound-absorbing carpet performed significantly worse than the paper or foil. To counteract this, I applied a moving average to the data - that way, the influence of large errors would be reduced. You can see the effect on the standard error (basically the spread of the data which we want to be 0) in this table:
Speed Measurement
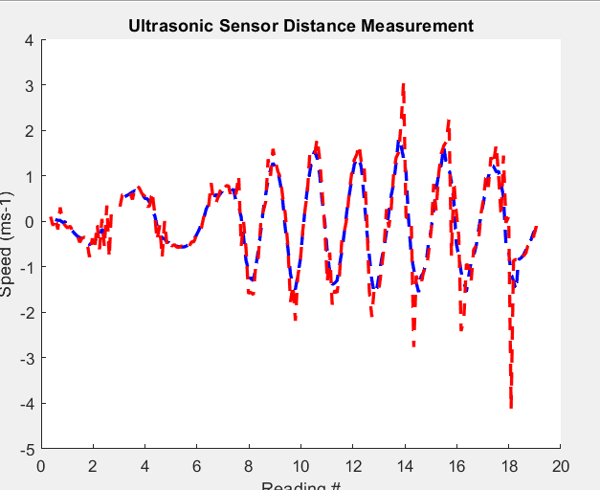
With the first two tasks finished (and with maybe a bit too much time on my hands), I decided to try and detect the speed of an object with my sensor setup - after all, speed is just the change in distance over time, right? While easy enough to code in a new MATLAB script, in practice this turned out to be quite tricky as small (and frequent) errors in distance were amplified into wildly inaccurate speed measurements - again, a moving average helped fix this, at the cost of lost resolution (the system became less able to detect rapid changes in speed accurately).
You can see below how the data-processed speed (blue) was far smoother than the raw speed data (red) of a piece of card swayed in front of the sensor.
 ## The Big Idea
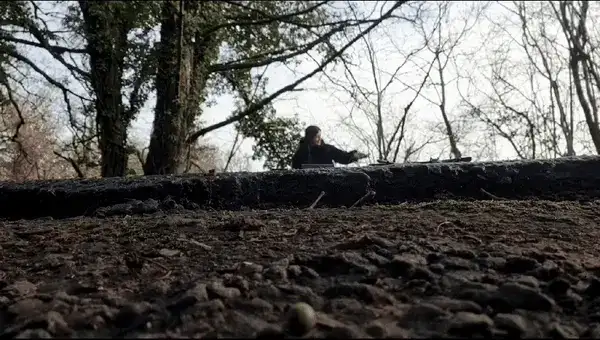
With speed measurement code written, I decided to see if I could measure the speed of my car. I experimented with driving towards and away from the sensor, as well as past it (it was pointed at an angle into the street, so some head-scratching trigonometry was needed). Here's the 'weatherproofed' setup (welcome to Wales), pointing into the street at an angle:
## The Big Idea
With speed measurement code written, I decided to see if I could measure the speed of my car. I experimented with driving towards and away from the sensor, as well as past it (it was pointed at an angle into the street, so some head-scratching trigonometry was needed). Here's the 'weatherproofed' setup (welcome to Wales), pointing into the street at an angle:
I quickly arrived on a few some problems with what I wanted to do:
- The sensor range was too small. This meant that it would only capture low speeds as I approached the sensor whilst braking/reversing away. This would be impossible to scale/verify.
- The sensor was focused at quite a narrow point - so as I drove past it at an angle, the varying shape of the car would wrongly register as a variation in speed. When the side bodywork of the car passed the sensor, it would essentially register 0 speed (as it could see no change in distance).
I eventually had a bit of a Eureka moment - and realised that I could use the sensor in a different way. Instead of directly measuring the speed of the car, it could point perpendicularly into the street, and measure the time taken for my car to go past (The sensor would see this as a relatively constant reduction in distance). This would work well as the sensed distance would either be out of range (no car) or very small (car passing).
With the help of a volunteer, I drove past the sensor re-coded for this setup several times, took an average of the speeds recorded, and compared this to my speedometer speed (which I tried to keep exactly constant). It turned out to be accurate (less than 10% error) for a range of speeds.
Limitations of my Solution
While a cool way of using the ultrasonic sensor, there were a few drawbacks in the system I created:
- My system relied on car length for speed measurement, but it’s not unreasonable to assume this could be retrieved from a database, so that other vehicles would be compatible with the system.
- The system struggled to accurately measure higher speeds - as the pulse rate of the sensor was limited, the system would estimate a higher speed than that actually being driven, because the car would appear to move past in fewer pulses as some would miss the car. An improved system could potentially use a higher pulse rate to mitigate this.
Conclusions
Overall, a fun and engaging project. I learned plenty about sensor design, circuit building, and MATLAB, and I’m glad I pushed myself to be creative and walk away with something more than a basic tripwire or reversing sensor at the end of the coursework. I also received a First in this coursework, which I was really pleased with. Stay tuned - that ultrasonic sensor took part in many more headaches further down the line…
References
[1] - Wiedemann, S., Analysis of Ultrasonic Sensors Regarding Their Use in Safety Systems in Industrial Environments. Munich: Technical University of Munich.
Author’s Note
Please note all car-related testing took place in a safe, controlled, environment, with the sensing equipment operated by a volunteer such that the driver was in full and appropriate control of the vehicle at all times. Replicate at your own risk.